
Vittle
Vittle
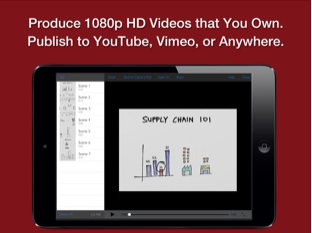
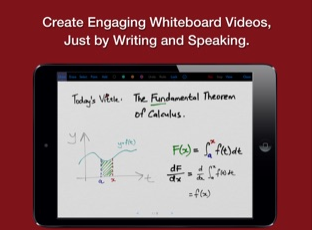
Vittle Pro allows the lawyer to create instructional videos and presentations right on the iPad.
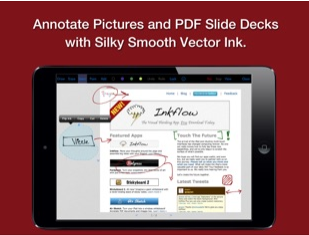
The app is like a magical white board that allows you to annotate and sketch using the Apple pen, zoom-in to focus on key points, and navigate through complex legal topics.
HD video files are produced that are completely controlled by the lawyer. The videos can be easily shared with clients, co-counsel, and mediators without having the need for a third-party service.


TrialLine
TrialLine
Create Powerful Timelines
TrialLine makes timelines so much more effective. Very easy to navigate, intuitive and extremely powerful. It customizable so you create the categories relevant to your case and color code as many as needed. Add supporting documents and media or both to every entry. You can also view your entries in "list view." There are no restrictions on what types of files you can add to your entries. Multiple documents and media files may be attached to every entry. You can view your timeline showing one, some, or all of your entries by category. Collaborate with your team and others through posting comments. Share views with experts and export reports including chronologies. TrialLine.net
Liquid Text
Liquid Text
LiquidText is an app that runs on your iPad for annotating and reviewing documents. It is completely unique in its functionality. More than just letting you highlight text and add notes, it allows you to “pull” sections out of your document and literally connect them together like they were pools of liquid—hence the name. It is not available for Windows devices, sorry.

Check out this YouTube explanation of the functionality.
Mac's New OS
Mac's New OS
The new Mohave operating system is loaded with great features. Let’s look at two of them that will help you make better visual presentations.
Camera Continuity
When building a presentation, wouldn’t it be convenient to be able to take a picture or scan a document with your iPhone and immediately have it appear on your laptop? Camera Continuity, a feature built into Mohave, allows you to do just that.
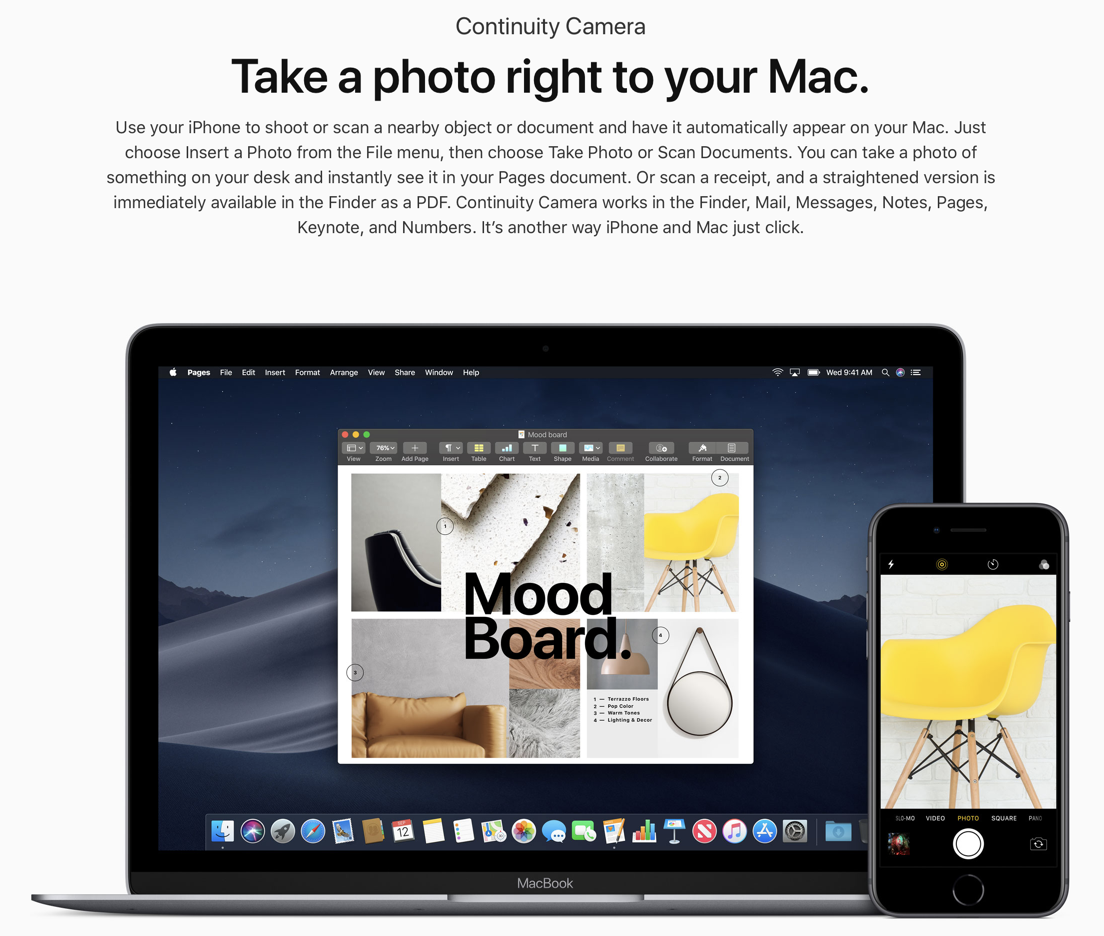
Camera Continuity
Take a picture or scan a document with your iPhone and have it show up immediately on your laptop.
Here is a YouTube video explaining this feature in full:
screen capture tools
Mohave now has a built in screen capture tool that allows you to capture both images and videos, edit them, and immediately save them for use in your presentations. This is similar to the functionality of Snagit, a program also discussed on this site. Give this a try by simply clicking Shift+Command+5, which creates a resizable window and brings up the tools available to capture what is on your screen.

Stagepro
+ a Belkin Light Table
Stagepro
+ a Belkin Light Table

You don't need an expensive ELMO projector to serve as your document camera. Use your iPad and this companion app called Stage Pro. The app is just $5.00. Buy a Belkin light table for less than $150, two options discussed below, and you are in business.
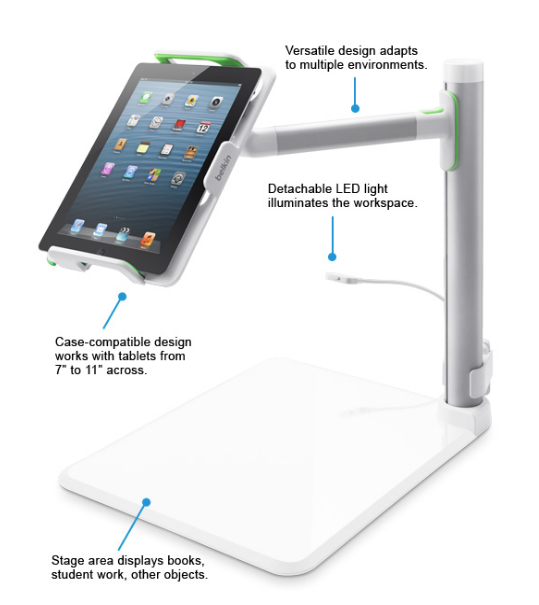
Belkin Tablet Stage
This holds your your iPad in an adjustable frame, and uses your built in camera as the video projector. It comes with a portable LED light for illuminating the documents or items displayed. Connect it to your projector or monitor.

Belkin portable Tablet Stage
This is a smaller, more portable version of a light table. You can also use it to simply hold your iPad in place when using it at a podium or from a table.

Stage Pro app
This $5.00 app gives you so much more than just a live image. You can add a document to your screen and use the pen to draw connections between an item and something described in writing. You can bring up a white board and simply draw on it. Use your imagination and find ways of connecting your visual content to your audience.
Transcriptpad for iPad
Transcriptpad for iPad

TranscriptPad for iPad
Like DocReviewPad, this is a similar application that allows you to review and assign issue codes to deposition transcripts. Another LitSoftware product, it works seamlessly with TrialPad for iPad.
Here is the product description from LitSoftware:
"With TranscriptPad, the power of desktop transcript review is made easier, faster, and portable! It’s a myth that powerful software requires a large investment and a desktop computer. TranscriptPad for iPad has all the powerful transcript review features you wish you could get from your laptop. It’s also a myth that powerful software is hard to use. TranscriptPad is intuitive and effective."
ORGANIZE:
FIND WHAT YOU NEED, THE MOMENT YOU NEED IT
"With TranscriptPad you can keep all of your transcripts and associated exhibits organized, and take them wherever you need to access and review them. TranscriptPad automatically folders and organizes according to deponent name and date, making it easy to locate a transcript. Exhibits are easily stored and accessed in TranscriptPad so that you can review them without losing your page or your thought process. Just select an exhibit in the built-in exhibits file, review it, and when you close it, your transcript will be waiting right where you left off."

REVIEW:
IMPORT & REVIEW TRANSCRIPTS ON THE GO
"Reviewing a transcript with TranscriptPad is a simple and easy process. You can read hands free, and in three quick taps or less, you can assign Issue Codes, Highlight or Flag and comment on any section of the transcript. You can print or email individual transcripts with your markups, or send your entire case folder with all your issue codes and exhibits from your iPad to another TranscriptPad user for a second pass, saving a lot of paper, and a lot of time."

SEARCH:
KEYWORDS HAVE NEVER BEEN MORE POWERFUL
"As you review, you can search for key words through hundreds of transcripts in mere seconds. All results appear in context, and are easy to navigate and organize. Search keywords in a single deposition, or across an entire case. A simple tap on the search results brings up the page with your search term highlighted. There is simply no better way to search deposition and trial transcripts."

CREATE REPORTS:
SUMMARIZING YOUR REVIEW HAS NEVER BEEN EASIER
"TranscriptPad can condense all your review work into an organized report in mere seconds. Reports are fully customizable, and easily emailed or printed. TranscriptPad reports will revolutionize your review and collaboration process."
DocReviewPad for iPad
DocReviewPad for iPad

DocReviewPad
This is a companion product to TrialPad for iPad, written by LitSoftware.
Here is the product description from LitSoftware:
"DocReviewPad allows you to carry all your documents in one app, the only full featured and mobile document review tool available for the iPad. Each matter is stored in a separate case folder, and all your documents can be annotated, assigned Tags, and given color-coded Issue Codes, or Flags.
Filter and view your documents by Name (A-Z or Z-A), a Custom sort order of your choice, by Bates numbers (low to high or high to low), or only see the documents that have been Reviewed.
Organization goes one step further with DocReviewPad’s archive capability. The archive tool backs up your case, complete with Issue Codes, Flags, and annotations, so that you can share your case with another DocReviewPad user."
Organize:
ORGANIZE EVIDENCE WITH ISSUE CODES AND TAGS
"DocReviewPad allows you to carry all your documents in one app, the only full featured and mobile document review tool available for the iPad. Each matter is stored in a separate case folder, and all your documents can be annotated, assigned Tags, and given color-coded Issue Codes, or Flags.
Filter and view your documents by Name (A-Z or Z-A), a Custom sort order of your choice, by Bates numbers (low to high or high to low), or only see the documents that have been Reviewed.
Organization goes one step further with DocReviewPad’s archive capability. The archive tool backs up your case, complete with Issue Codes, Flags, and annotations, so that you can share your case with another DocReviewPad user."

BATES:
ASSIGN BATES NUMBERS SO THAT EVERYONE'S ON THE SAME PAGE, LITERALLY
"With DocReviewPad, when you import documents you have the ability to assign custom Bates numbers, with up to 6 letters and 9 numbers, that automatically increment on every page (e.g. ACMECO-123456789). When each page has it’s own unique identification number there is no question as to which page of which document you are directing the judge or witness to look at.
You can also sort your documents by Bates numbers, or perform a Search to find a page with a particular Bates range. After assigning a Bates number you can edit the location of the Bates number to eight possible positions, to making sure important information is not obscured.
You can keep all your cases on your iPad, putting all your documents at your fingertips in a searchable, easy to access, and organized way. Client meetings, hearings and mediations no longer require large boxes of files. DocReviewPad works with cloud services: Box, Citrix ShareFile, Dropbox, Transporter, and WebDAV. You can also use email or the File Sharing feature in iTunes to import or export your documents."

EXPORT:
EASILY PRODUCE DOCUMENTS TO OPPOSING COUNSEL, OR IMPORT THEM INTO TRIALPAD
"Whether you need to create a production set, review a production set provided to you, or export certain documents to TrialPad for a mediation or trial, DocReviewPad has you covered. During an Export you can decide to include or exclude documents based on if they have been reviewed or not, have certain Tags assigned to them, or have specific Issue Codes."
PowerPoint
PowerPoint

Powerpoint
All of us have seen PowerPoint presentations, most done ineffectively and some done brilliantly. And most of us have built a slide deck for our own presentations. Put aside any bias against this tool--it remains one of the most versatile and effective information presentation platforms available. Whether run as a program on a laptop or as an app on either an iPad or tablet, it is as good (or bad) as you make it. A presentation built on one platform can be saved and stored in a cloud setting, giving you the ability to work and present from multiple platforms. Our purpose here is to help you find new ways of using PowerPoint and better ways of building presentations. So be open minded, and learn something new.

Basic Tips
Let's start with 5 basic tips to follow when building a presentation. And let's keep this simple.
1. One message per slide. If you are doing a list, reveal and conceal each item separately so that there is only one showing at a time.
2. Combine a visual image with short text summary of key points--steer focus with contrast and size
3. Simply, the most important part of your slide should be the biggest. Remember what causes us to focus: movement, signaling color, contrast rich objects, and big objects. So, headline should be reduced in size unless it is the most important part of the slide. Otherwise, reduce the headline size and enlarge the content.
4. Contrast--High contrast is best, black background and white letters, red for accent.
Black background keeps the speaker as the highest contrast image on stage.
Six is the magic number for the maximum number of images on the screen.
5. Do not speak when asking the audience to read.

Use for Case Management
As you gather information during the life of a case, consider using PowerPoint to organize key events, images of key evidence, and applicable law. Simply create a template for use on every case. Add the template to your digital file setup. Then add content during the life of the case. The program is flexible, allowing easy addition of new slides or reorientation of existing slides. Imbed screen shots of key documents. Use your imagination.
We have pre-built some PowerPoint templates for you to use in your own practice as a starting point for getting organized.
Mediation template
reporting template
settlement conference template
Here are a few TED talks on PowerPoint and effective presentations with PowerPoint that are worth watching.
Trialpad for iPad
TrialPad for iPad
Trialpad for iPad
TrialPad for iPad

Trialpad for ipad
Trialpad is a full blown document presentation app that runs on an iPad. It allows you to create highlights and callouts to document or images on the fly. You can create these in "war room" mode and, when ready, project them to your audience. Documents, videos, and images are easy to import and organize.
Trialpad for iPad is one of three apps that LItsoftware has developed to work together. The other two are called TranscriptPad and DocReviewPad, which also run on an iPad. Bought together, the suite costs about $150. Collectively, these three apps are powerful tools for the lawyer that likes to live on the road and in court with an iPad.
importing documents
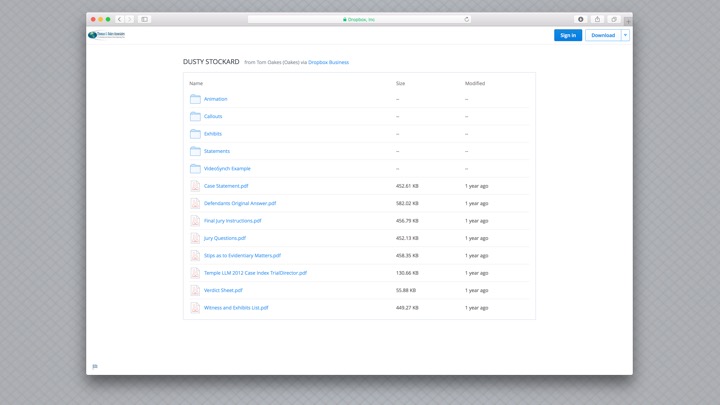
TrialPad is set up to import documents, video clips, and the like from four different cloud storage services: Dropbox, box, Citrix ShareFile, or WebDAV. Once you have opened up TrialPad and created a new file folder for your case, you will see an icon for a cloud on the left side of your screen. Clicking on it opens up this dialog box:

Here you can link your cloud storage account with your TrialPad app, and use it to add selected files to your case folder:

In this window, you first click on "Select Files or Folders", then click on each folder or file you want to import. You will then be given an option to pick the case folder into which you want the files imported. Once the materials are in your case folder, you are ready to organize them anyway you want. And they are now ready for presentation.
Looking inside this sample case file, you can see text documents and images. Selecting one of them places the document or image on the presentation screen to the right. The tool bar at the top allows you to create a "Callout" by simply drawing a box with your finger or stylus around any part of the image. You can also "Highlight" your callout. The "Pen" feature allows you to draw on the image. You can "Redact" sensitive information. And the "Laser" feature allows you to use your finger or your stylus on the screen as a pointer to any key piece of information. The image in the lower right showing a single and a double page allows you to bring up two pages side by side. Some of these features are displayed in the screen captures below:

Select your document or image on the left hand side, to be displayed on the preview screen.

You can move this image around the screen just like you could if you were viewing it in your Photos app. You can pinch or expand it as you desire.

This shows a callout that has been created on the fly by simply drawing a box around the desired text with your finger or a stylus. That same information can then be highlighted for emphasis.

Here are two documents brought up side by side, with a separate callout selected from each. Notice that the double page icon in the lower right of the screen has been selected, indicating that you want a double, not a single, image displayed.

Note here the bright red spot, created by clicking on the "Laser" tool and then just touching the screen.
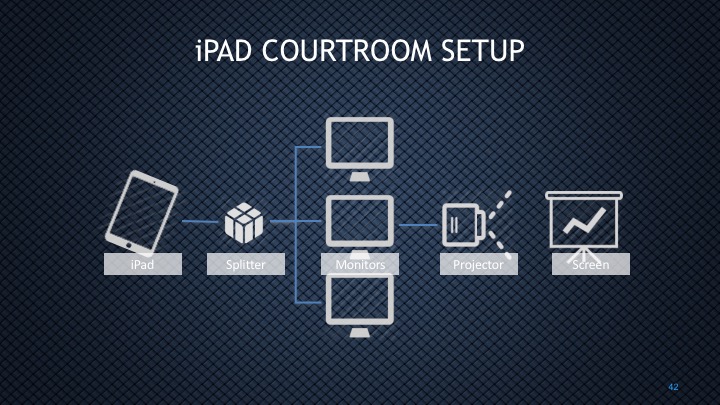
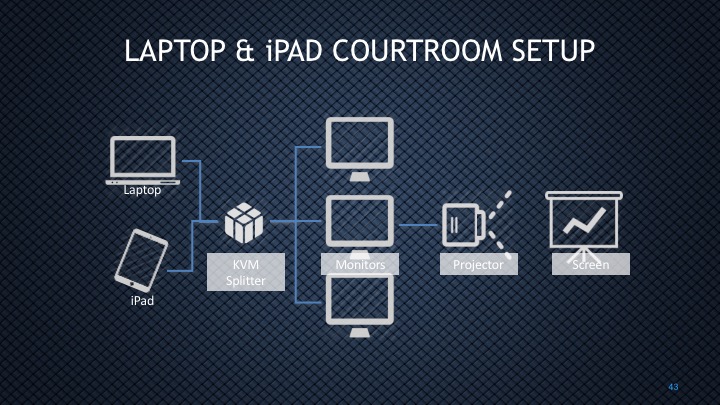
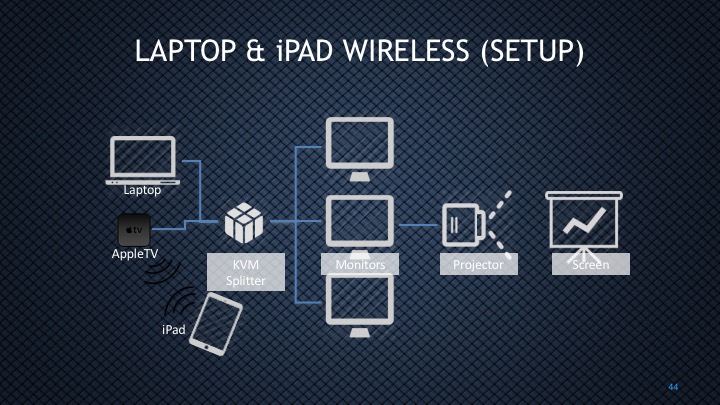
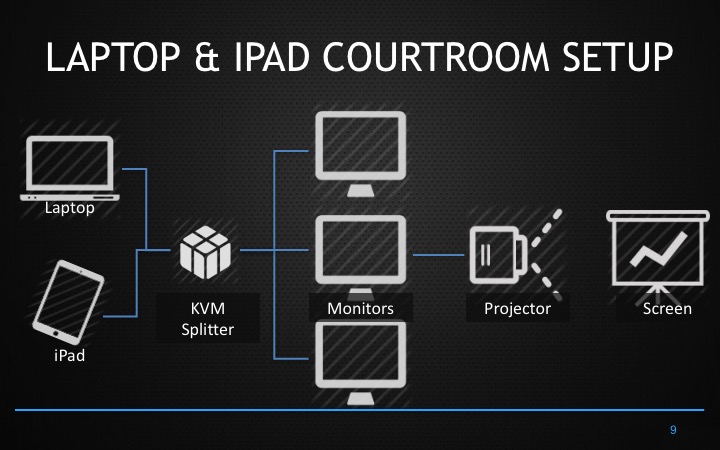
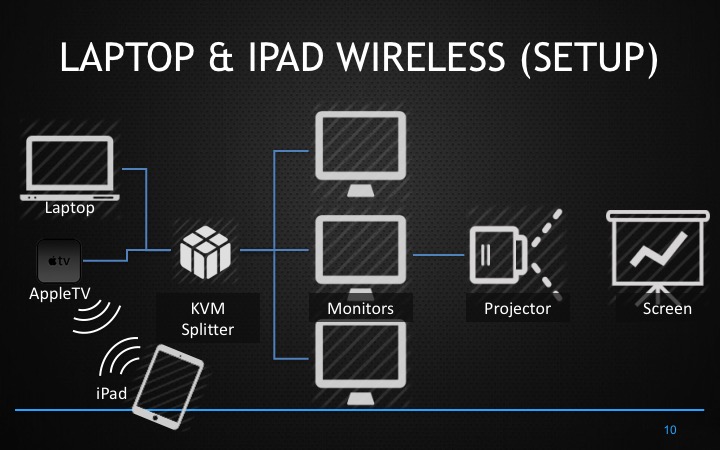
All of the screen capture images above were taken before the iPad was connected to an external monitor or projector. Once connected, either directly using an HDMI cable and the appropriate dongle (more on this below) or wirelessly via your Apple TV (see the section of the website giving step-by-step instructions for making that setup, you are ready to present. Once connected to an external source, you can toggle the "Output" switch to the right as indicated in the image below. Note that next to the "Output" toggle button are three options: "Blank". "Freeze". "Present".
Start with the Blank option highlighted. This allows you to pull up the desired images and create and callouts and highlighting without the audience seeing your preparation. Rather, your presentation monitor or projector will simply display a black screen with the words in white mid-screen: "TrialPad for iPad." Then, when you are ready to present, that's right--you touch the "Present" button. Whatever images you have built on the display screen on your iPad will now be presented. And don't worry, the audience will see only what is on the display screen and not the menu options visible on your iPad, which is in "war room mode." Below is an example of what you see and what the audience sees when you "present" something that you have created on your screen:

War Room
This is your iPad view.

Audience View
This is what the audience sees when you are connected to a projector of monitor, toggle the "Output" button, and hit the "Present" option. When you want to remove this view, and go back to the black display showing only "TrialPad for iPad", simply hit the "Blank" button, which takes the image off the audience's screen. The "Freeze" option does just that, freezes in place whatever you are presenting to the audience.
Tom Oakes has put together a three page primer on TrialPad, posted below.
Tutorials
Here are some helpful tutorials that LitSoftware has put together on TrialPad for iPad.
3D Mapping
3D Mapping
Google Earth
Google Earth allows you to orient your audience to a physical location by zooming in from outer space to a three dimensional street view of the incident scene in your case. It is free. To use it live, you must be connected via a wifi signal or a cell signal. For most major cities, Google has created a "street view" option, that allows you to literally move your audience down the street from the pedestrian or driver perspective.

Street View
Maps App on iPad
This is an app that comes standard on the iPad. It has both a 2D and 3D view, and also allows you to zoom in on a scene. Like Google Earth, make sure you are connected by wifi or cell signal in order to use it live. You can also take a screen shot of the image and drop it into a PowerPoint slide.

Screen shot of iPad image

Snagit
Snagit

Snagit screen capture software
SNagit
Snagit allows you to quickly and effectively capture whatever is being displayed on your screen, whether it is a still image or a video. You can then edit what you have captured, save it, and drop your capture into a presentation, such as a PowerPoint slide. So often we see something in our internet search--a powerful image or a video--that we would like to "capture" and use in a presentation. This is the ideal tool for that purpose. Don't be confined to finding only "stock images" and canned photos for use in your presentations. This powerful and easy to use program allows you to snag anything out there on the internet, edit it, and use it. Snagit is a software program that runs on Windows and Apple computers.
But it doesn't stop there. Snagit allows you to record what you are doing on your screen as a video, including the option of adding video from your webcam. So you can put together explanatory tutorials. Think about all of the uses for this, such as narrating a video or explaining a step-by-step operation. We will be building Snagit tutorials and putting them on this website over time.
tutorials
Below are a series of tutorials showing the step-by-step process for capturing, editing, sharing, and displaying captured images and video.
Overall functionality
CAPTURE
This tutorial explains all of the basic functions for capturing screen content found on the web.
Edit
This tutorial explains that tools available in the program to edit what you have captured, adding shapes, color, explanatory comments, and the like.
Building slides on Snagit's "Canvas"
This "canvas" feature allows you to build unique graphical images with Snagit tools. Then use what you have created in your presentation that you are building on PowerPoint.
sharing what you have captured
Now that you have captured and edited an image, watch this tutorial to learn how to quickly send your media to other programs for use.
creating and capturing a video tutorial that you make
Snagit allows you to capture a video recording of your on-screen activities, useful if you want to create an instructional video, adding narration and even video cam footage of you as you give an explanation.
panoramic capture
We all know how our iPhone or other smart phones can take a panoramic image, essentially stitching together a series of images as they pass by the restricted field of view displayed on our phone. Well, sometimes we find large images on the internet that more than fill a single screen of our computer, and we want to capture the whole larger image without having to take individual screen captures and somehow stitch them together ourselves. Guess what, Snagit does that for us, working much like the same feature on our smart phone. This tutorial tells you how to do it.
Trial Director
Trial Director
TrialDirector – the most flexible and widely-used trial presentation technology available. Easily organize, annotate and customize your exhibits for large or small cases. Present virtually any type of document or media from your PC, tablet or iPad and create deposition clips in a snap. Streamline your entire trial preparation and trial presentation process with one simple tool.

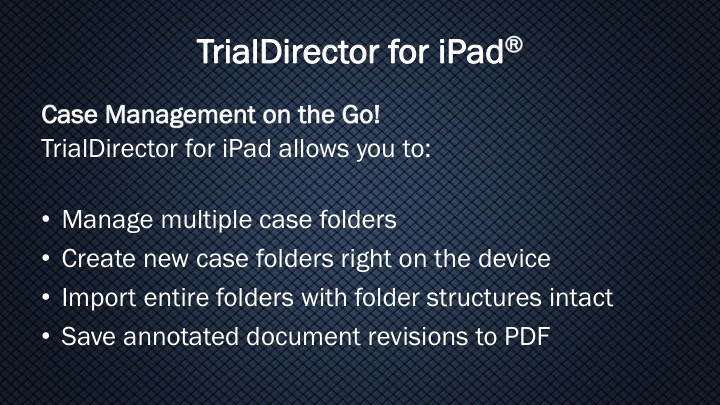
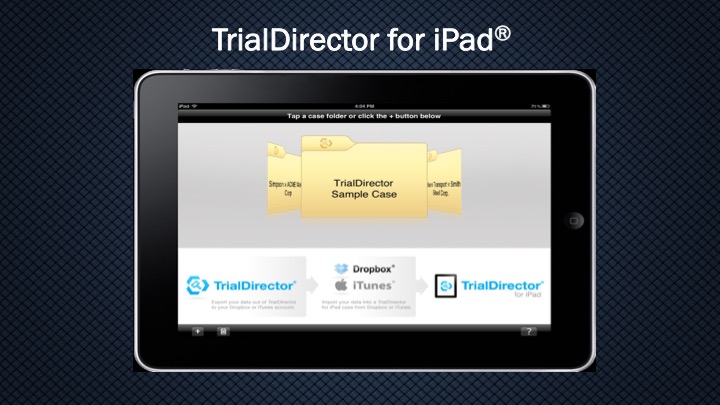
Trialdirecor for Ipad
TrialDirector for iPad is a simple evidence management and presentation tool designed specifically for use with the iPad. With TrialDirector for iPad, you can create a case folder, add exhibits to your case through a DropboxTM or iTunes® account and interact with your evidence using the annotation and presentation tools. Or for a more professional and feature-rich experience, prepare your exhibits in TrialDirector 6 and export to TrialDirector for iPad for presentation.
Fair warning, TrialDirector takes a bit of time to learn. If you are presenting only documents and images, and you are looking for a simpler and more intuitive presentation tool, use TrialPad for iPad or TrialDirector for iPad. But if you have taken video depositions in your case and want to create clips for presentation, then this is your solution. With a bit of work, you can figure out how to create and display clips of testimony, with the transcript synced to the video and scrolling beneath the video window--a clean and highly devastating way of impeaching a witness with prior testimony.
If you want to be "all powerful" in the courtroom, then invest the time to learn how to use this superb program, which runs only on a PC. An abbreviated version has been built as a app for an iPad.
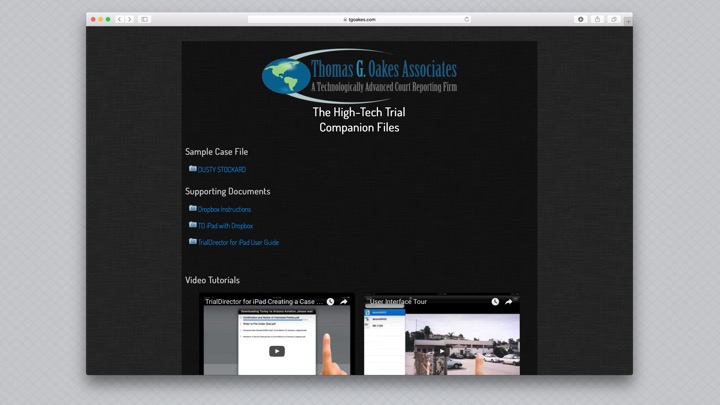
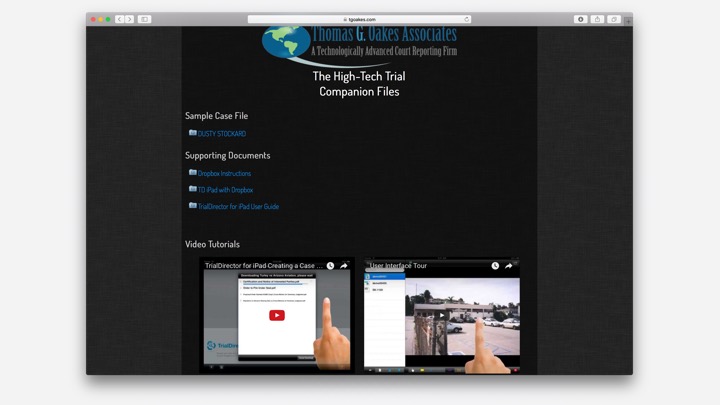
Here are a series of "how to" materials that inData has prepared for learning various functions and features of Trial Director.
Tom Oakes and his team are masters at TrialDirector. Tom teaches TrialDirector to students at Temple Law School. Below are three presentations that Tom has done on trial technology, TrialDirector, and TrialDirector for iPad.


Tom Oakes has put together the definitive checklist for using Trial Director at trial. See below:
Here is a Quick Reference card that the makers of Trial Director have prepared. Print this and take it with you anytime you are presenting.
Body Anatomy
Body Anatomy

Human anatomy atlas
Visual Body is a company that has developed a series of apps, downloadable on both Microsoft and Apple software computers and tablets, that provide you with detailed human anatomy images in 3D. Pick your body region and system (e.g. skeletal, digestive, lymphatic, circulatory, etc.) to explore. The images can be rotated and reorientated at any angle. The program allows you to highlight and "remove" any body structure, so that you can zoom in on the body part at issue in your case. It has a pen for drawing on the image. You can add notations, export it photos or send it as an email attachment. I have had my physician expert use it on the stand with a jury, manipulating the key images wirelessly from an iPad connected to a projector.
HAIKU DECK
HAIKU DECK
Haiku deck
An intuitive approach to building slide decks
Tired of the standard slide formats available in PowerPoint . . .
Haiku Deck is an App that runs on you iPad. It is also accessible by logging into your account on your laptop. Download the App from the App Store. It’s free, but you are going to want to buy a subscription ($120 for the year) so that you can download the slide decks you create, keep them out of the public domain, and finish any final editing—adding transitions and animation—in PowerPoint.
“So if I have PowerPoint, why do I need this App?” Good question. It is best answered by playing around with the App itself. Here are some key features that make it a great place to build slide decks:
You can access a large gallery of decks that others have built and download them to modify for your own use.
The default templates have great design features, focusing on minimal written content and maximum visual impact. The fonts are already set up to be large and well placed on the slide. You can quickly select the slide format from a small selection of options, all of which eliminates the need to spend hours coming up with your own design. Unless you are really good at formatting slides, the built in designs are better than what you would likely do on your own.
You have instant access to a large library of high resolution images to add to your slide. You can search the library using any of the words on your slide to quickly find metaphorical images or you can access your own photos—very powerful.
Just take a look at the screen shots below that show you the menu options for each of the five icons on the toolbar running down the lefthand side of the work area. You can instantly see how easy it is to build slides.
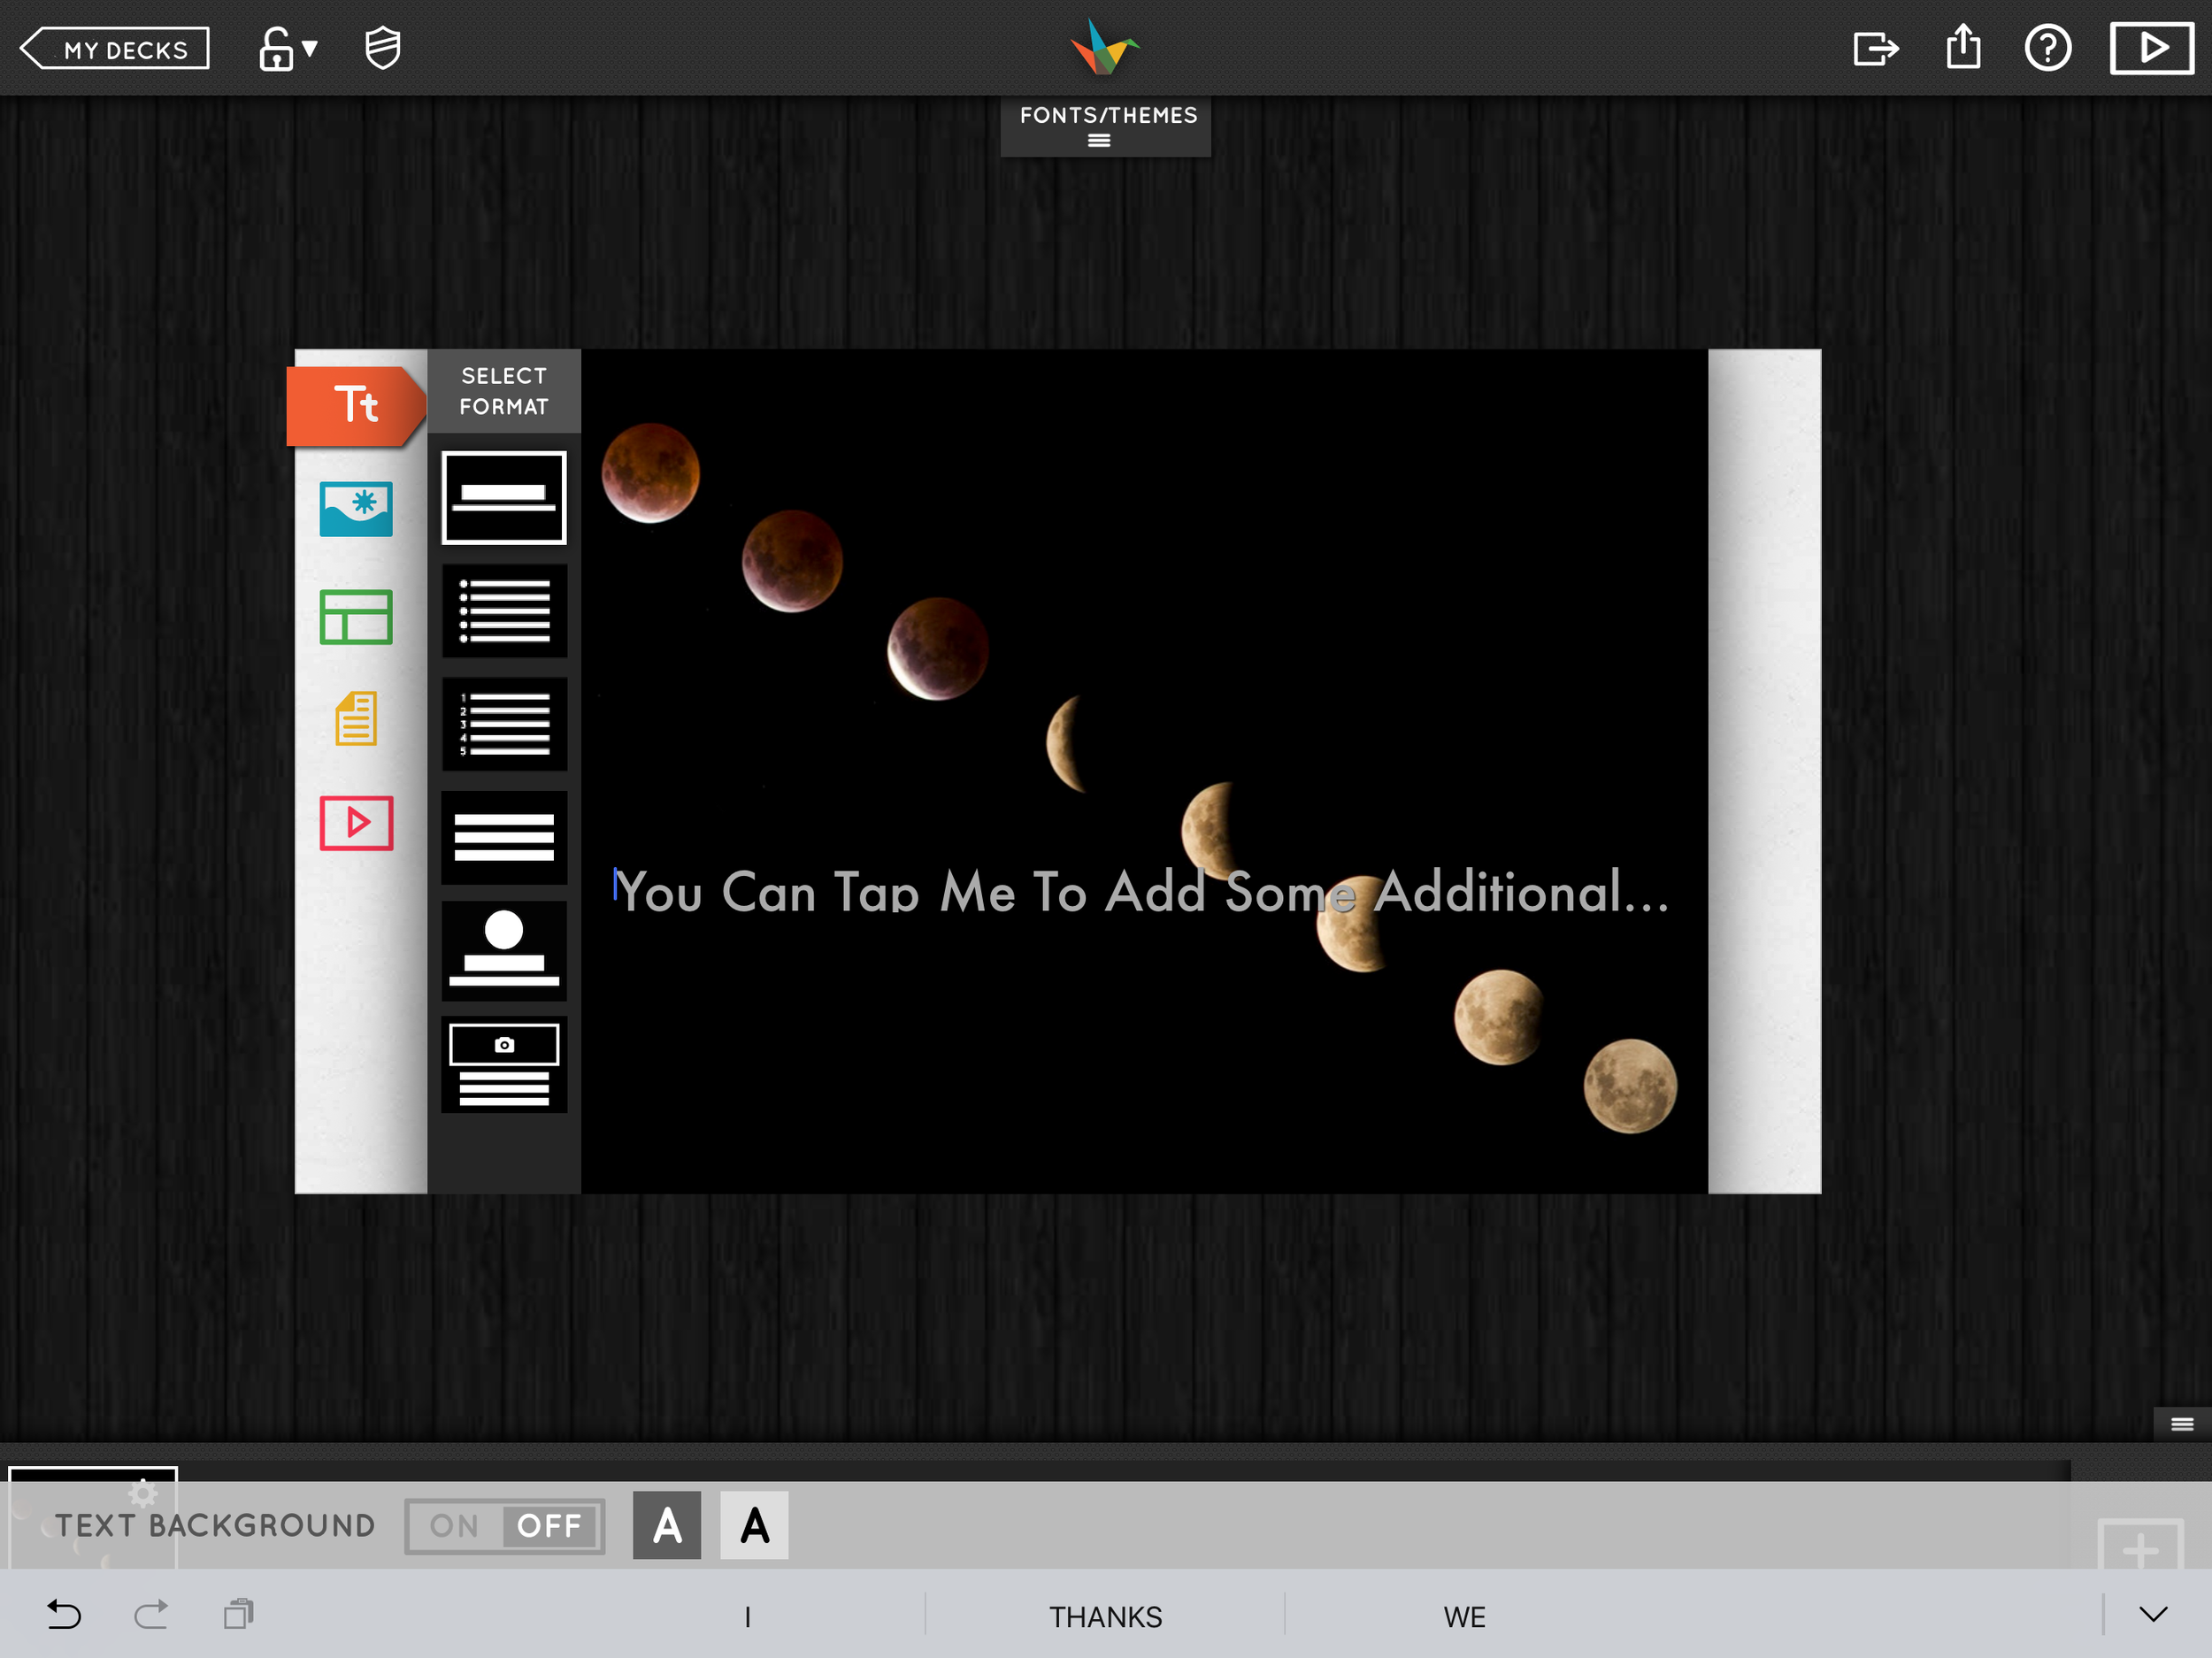
Make a selection of text position on the slide.

Search for an image to add to your slide.

Layout selection is quick and easy.
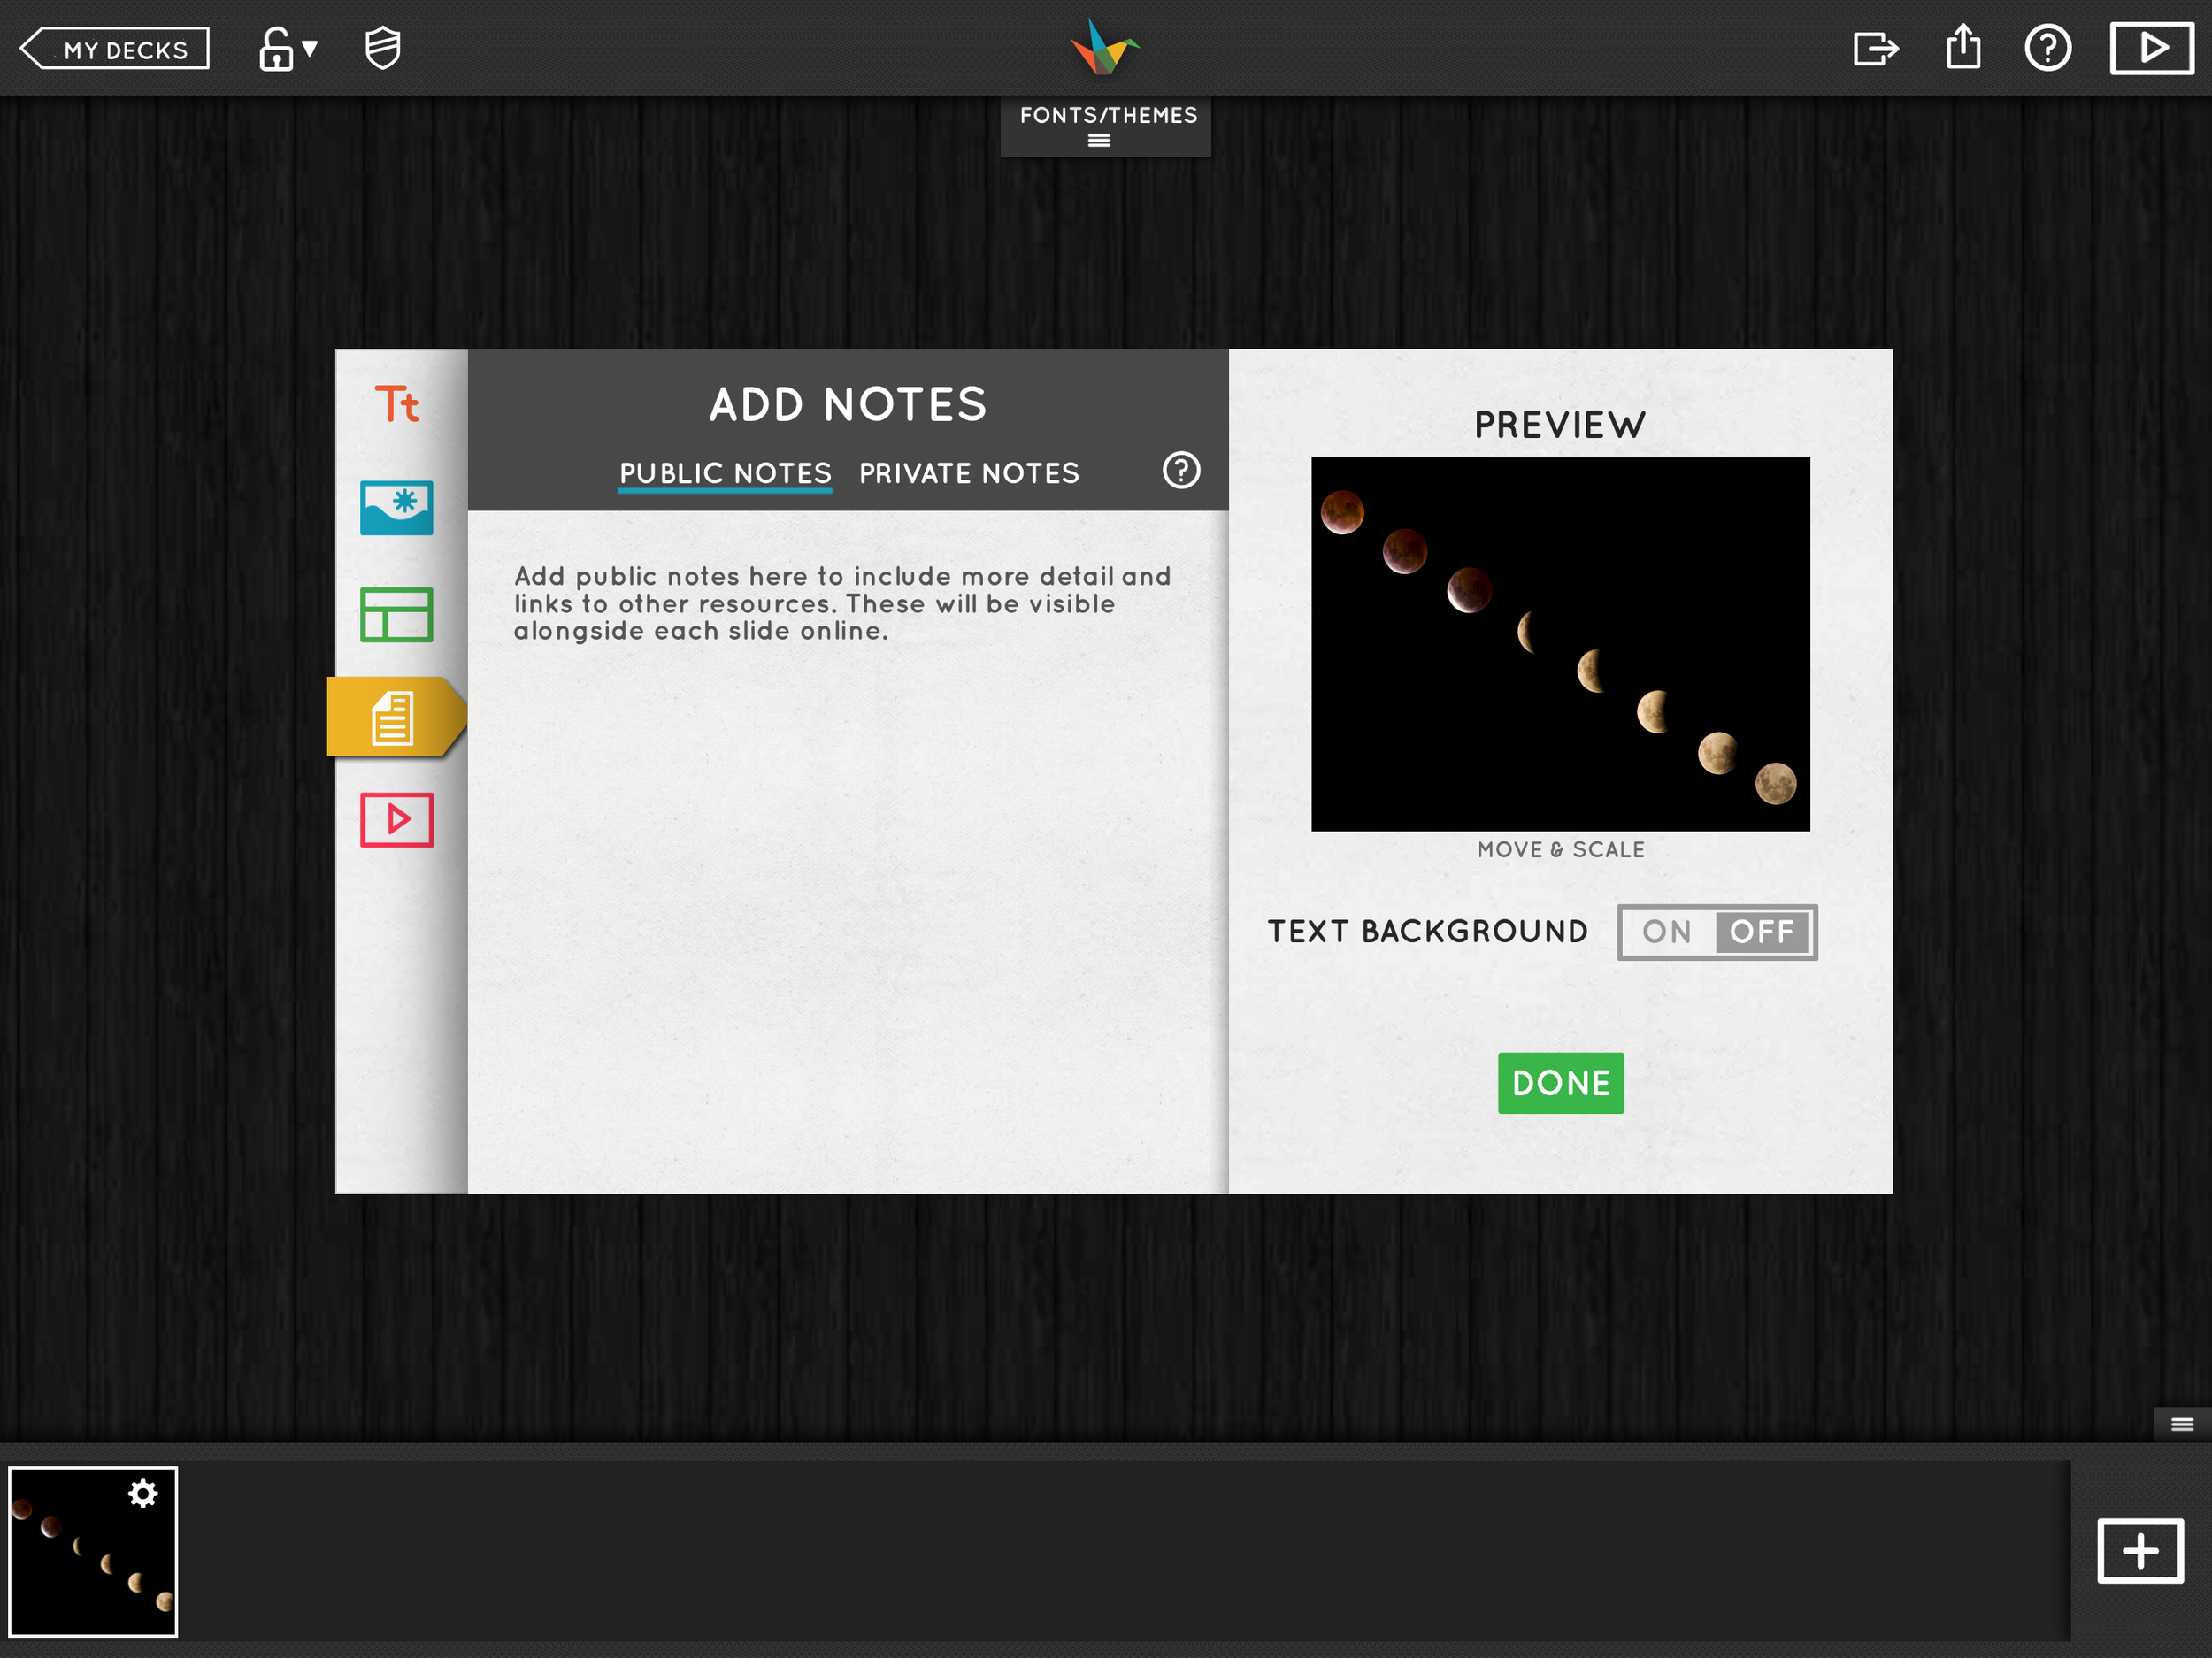
Add presentation notes

Quickly add a video clip with easy access to YouTube.
Check out this video link to see the App in action.
When you are done building your deck, simply press the export arrow in the upper right hand corner. Select the download option that fits your need. If you download it as an “EDITABLE PPT/KEYNOTE” it is saved on your iPad. You also have the option of emailing it directly as a PPT or Keynote deck. Then finish it up there by adding transitions, animation, or other design features.

Play around with it. You may find that it becomes the “go to” platform for building your static visual presentations.
Notability
Notability
Note taking on an ipad
Notability is an app that you can use on your iPad, Mac, and iPhone to take and organize notes, synching them across all your devices and saving them to cloud storage.
The app is best used on an iPad Pro, which allows you to utilize the Apple Pencil stylus. You can handwrite or type, insert documents, images, or photos. Have your notes with you all the time and access them anywhere. Once you start using this app, you will not switch back to a yellow legal pad.
Apple believes that Notability is THE app to use for note taking and features it on its video highlighting the features of the new iPad Pro. Watch this clip. You will see that Notability has the ability to recognize your handwriting and convert it to text. It is the best note taking app available.

Sync notes across all of your devices.
Take notes on your laptop, iPad, or iPhone, and have those notes sync automatically across all your devices. Whether you are typing or handwriting, the notes flow across devices seamlessly. Add photos or images as you go. It is an easy way to stay organized.
tutorial
Here is a 15 minute tutorial that is quite comprehensive on how to use all of the key features of Notability.
testimonial of a real user
"Having now used Notability for a couple of years as an exclusive note taking vehicle in trial, I have found some practical tips to pass on. Working on an iPad with all trial exhibits loaded into TrialPad, I am quickly able to take a screenshot of a particular exhibit or portion of an exhibit that is the subject of examination. I then bring that screenshot (which is in my Photos on the iPad) into my notes in Notability, allowing me to mark up exactly what portion of the exhibit is being discussed. Changing colors with my stylus, I make notes about questions to ask in cross examination. The flexibility of changing colors, importing images, and viewing all pages of my notes in a side view, allow me to stay organized and completely prepared for cross examination." Bob Christie, Christie Law Group

Teleprompt+ 3
Teleprompt+ 3

Turn your iPad into a full teleprompter.
Teleprompt +3 is a $20 app that allows you to use your iPad as a teleprompter. Paired with a companion app on your iPhone, which serves as a remote control device, it gives you the confidence to focus on your delivery, knowing your well composed content is right there in front of you. With a little practice, your audience will not be aware that you have an assistant. It is perfect as well for knowing the exact length of your presentation--the program tells you how long your content will take to deliver at your assigned scrolling pace. Pause it with the remote on your iPhone to ad-lib, and then restart it to go right back into your prepared remarks.
When you have crafted a strong verbal presentation, help yourself deliver it as prepared. Remove that level of anxiety that comes from having to memorize your content--or distract your audience by looking at down at your notes. This app is worth a try. And it is so easy to use.
Prepare your content as a word document, then copy and paste it into a new presentation on the app. Once it is saved in the app, you can quickly edit it on the fly. Download the companion app on your iPhone and pair it with iPad. Now you can use the phone as a remote to control scroll rate, speed up, slow down, or pause your presentation. Follow these steps below to get set up and going.

Importing a script
This step is easy. You can download a text file from cloud storage. But you can also just email yourself a word document if you prepared your script on another device, open the document, copy the text, and paste it into your new presentation. You can also type your text directly into a new script within the app itself.

Edit the script as you refine it.
The script can be easily edited within the app itself. And the app gives you script word length and the time length of the presentation. When you adjust the speed (more on that below), you can see immediately how it impacts your presentation time.

Using the iPhone as a remote
With bluetooth turned on (both iPad and iPhone), and with the app running on both devices, press the "broadcast" icon in the lower right hand portion of this image on your phone. The app on your phone will pick up your iPad as a device that it can control. Select your iPad.

Now you are connected.
Here is the screen indicating that we have successfully linked our devices, the iPad being listed as the connected "prompting device." You have the option here to "mirror" your text in horizontal or vertical orientation.

Press the start arrow and watch the countdown clock.
You can set a countdown clock for whatever length you want. You will see the countdown on your iPhone app.

Controlling the timing
Here is where you need to practice a bit. This is the image on the iPhone. The image on the iPad does not have the control bar at the bottom, just the text. So on your iPhone, you can speed up or slow down the scroll rate (tortoise and hare, get it?). You can also pause your presentation by hitting the pause bar, and restart it by hitting the start arrow. But you can also place your finger in the text itself and scroll forward or backward. With a little practice, you can work the remote without changing your focus on the iPad screen.

Apple Watch as a remote
There is also an app for the Apple Watch, which can function as a remote device to control the script.